
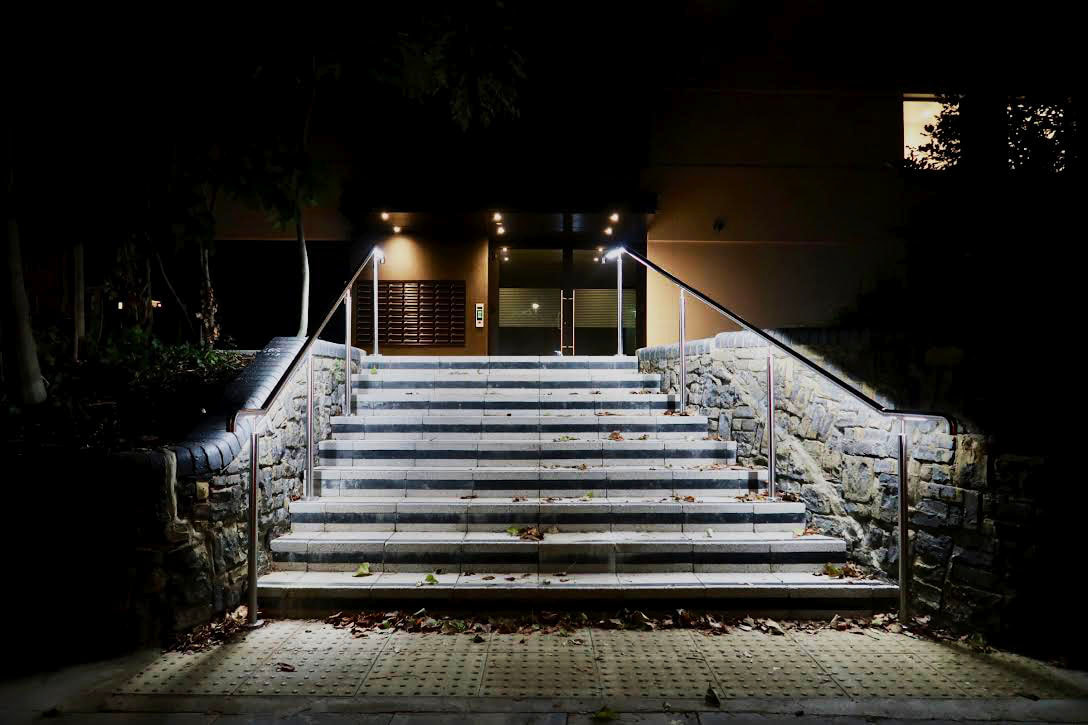
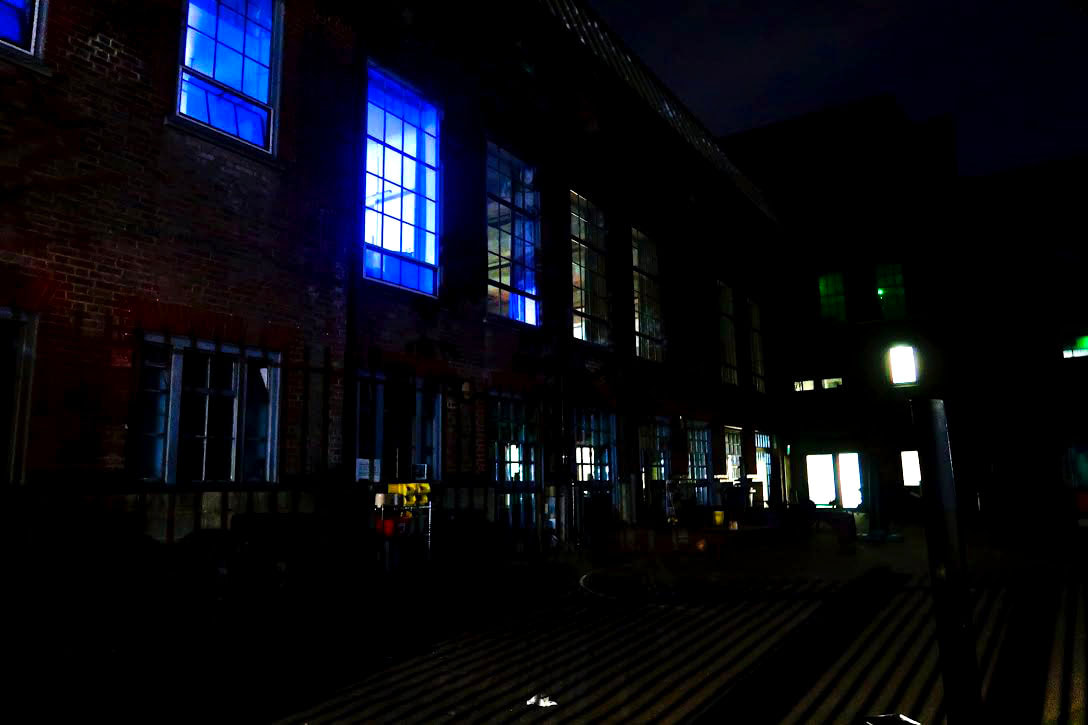
In this task i had to consider the city at night and notice how the place that we all live in transforms when the sun goes down. i tried to look, engage and capture the cities beauty at night. Garish floodlighting cast deep shadows and silhouettes; hues of pink, cyan and orange colour the streets. when these locations are devoid of its human players the scenery becomes highlighted and forgotten beauty revealed.
Photographer that influenced me...
William Eckersley

|

|
William Eckersley inspired me as his photos explore his hometown, illustrated by dull, grey daylight- transformed under the cloak of darkness. His images have a sense of mystery and horror as they are in quite unkown, hidden and run down places. |
My photographs


Best Edits

|
|

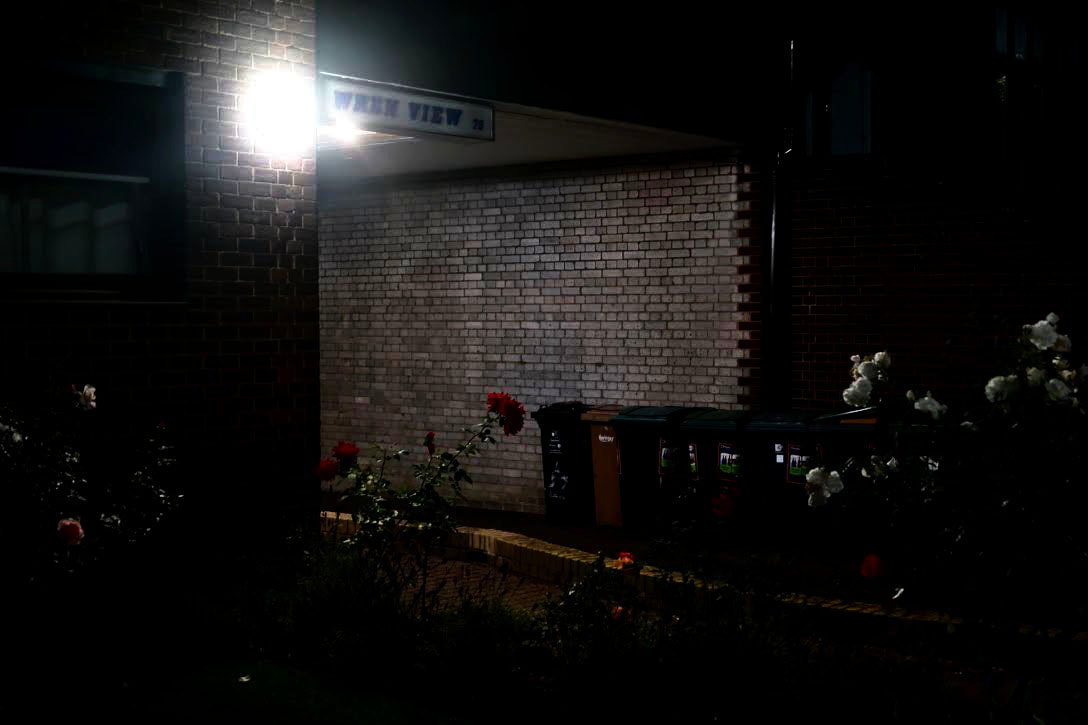
WWW: i was able to sometimes capture the reflections that the lights on the streets and around the houses made. These reflections created interesting shapes and colours that catch the viewers attention. i caught different colours of light such as purple, green, different shades of blues and red. this might suggest that at night London can be lively and eye catching with its intriguing hues casting penetrating through windows and beaming from buildings onto the streets.
EBI: some of my photos aren't very well focused so on my camera to prevent this problem, i could have used my focus lens to adjust the blurriness that i saw on the display screen of the camera. also some of photographs are slightly tilted or rotated so they aren't completely proportional which for some of these make it less appealing to the human eye. i could have tried to capture more rustic looking buildings with more dull lighting as that's the kind of style William Eckersley and Anthony Cairs went for and i like the eeriness their photographs build.
EBI: some of my photos aren't very well focused so on my camera to prevent this problem, i could have used my focus lens to adjust the blurriness that i saw on the display screen of the camera. also some of photographs are slightly tilted or rotated so they aren't completely proportional which for some of these make it less appealing to the human eye. i could have tried to capture more rustic looking buildings with more dull lighting as that's the kind of style William Eckersley and Anthony Cairs went for and i like the eeriness their photographs build.
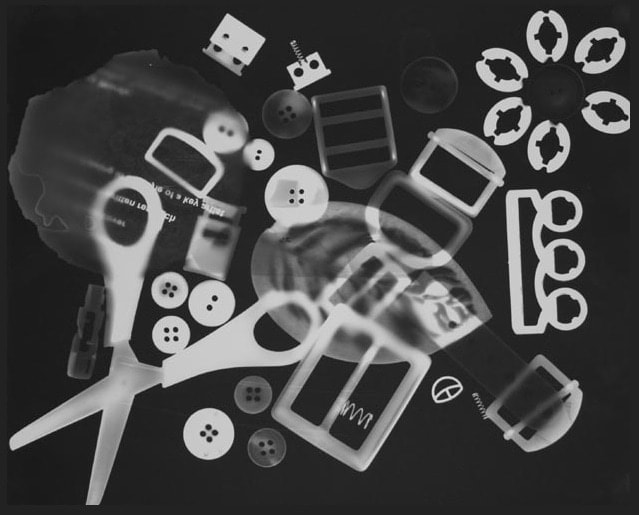
Photograms
What is a photogram?
A photogram is a photographic image made without a camera by placing objects directly onto the surface of a light-sensitive material such as photographic paper and then exposing it to light.
What is the purpose of a photogram?
Making photograms began with an intention to document the physical world. Although a certain fascination with the medium did exist from the start, it is more likely that photograms were primarily used for scientific purposes and the enhancement of knowledge, rather than expressionism for artists.
Who made the photogram famous?
the Hungarian Laszlo Moholy-Nagy in turn saw a portfolio of 12 Rayographs and produced his own experiments, which he called photograms. Popular for a few years, this movement had passed into photographic history by the 1930's.
How do you make a photogram? and what do you use?
To make a photogram you need to be equipped with photosynthesised paper, the light machine and the three chemicals named Developer, stop, and fix. put object on top of the photosynthesised paper then flash the light so that the photo is exposed to the light. Next, put the paper into the developer - stop -fix in order for 2-3 minutes each. then use the heater machine to completely dry the photo.
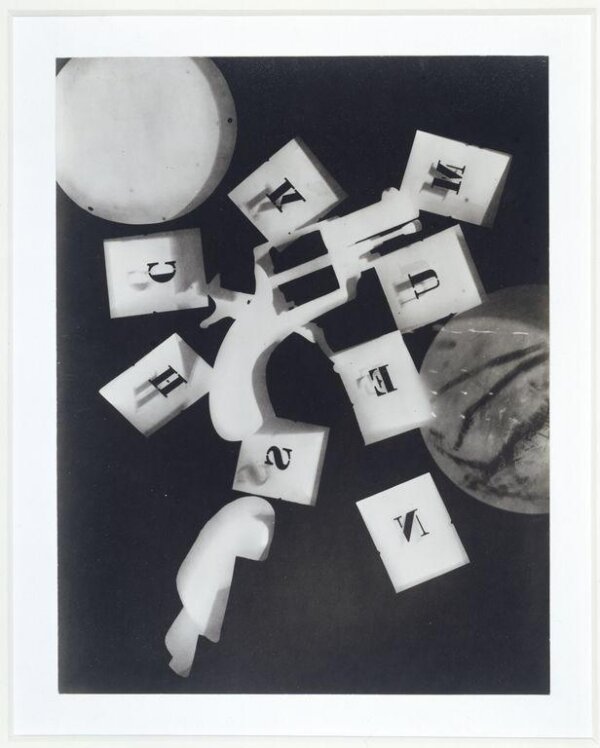
Man Ray
Man Ray was an American visual artist who spent most of his career in Paris who produced major works in a variety of media. Man Ray made his rayographs without a camera by placing objects like the thumbtacks, coil of wire, and other circular forms used directly on a sheet of photosynsitized paper and exposing it to light. This seminar concerns the rayograph, a type of photogram “invented” in 1922 by American artist Man Ray while living in Paris. Rayographs were ubiquitous in Dada and Surrealist circles and illustrated in countless contemporary journals; today, they are synonymous with concepts of the avant-garde and Modernism.

|
|
|
My photograms

Positive sandwich print
|

Painting with developer
|

Weaving
|

Double exposure/movement
|

Stenciling
|

Toning and solarisation
|
Best Edits


|


|


|

WWW: I like the contrast between the highlights and black points in the photographs. I like how all of my images are very clear and well developed.
EBI: My weaved photogram could have been better. To improve this piece, I could have made the separate pieces which I weaved, more even in width and length because some are different sizes which doesn't look very neat. I also could have made the strips smaller so that the final product (when it's weaved) look more impressive |
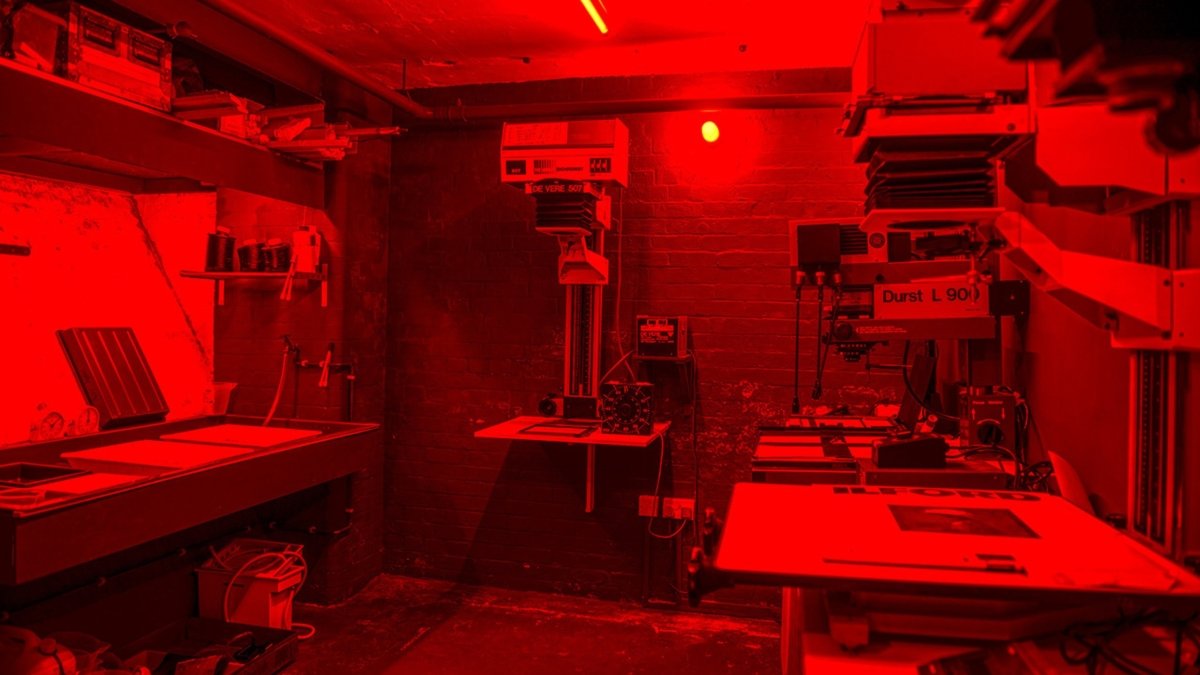
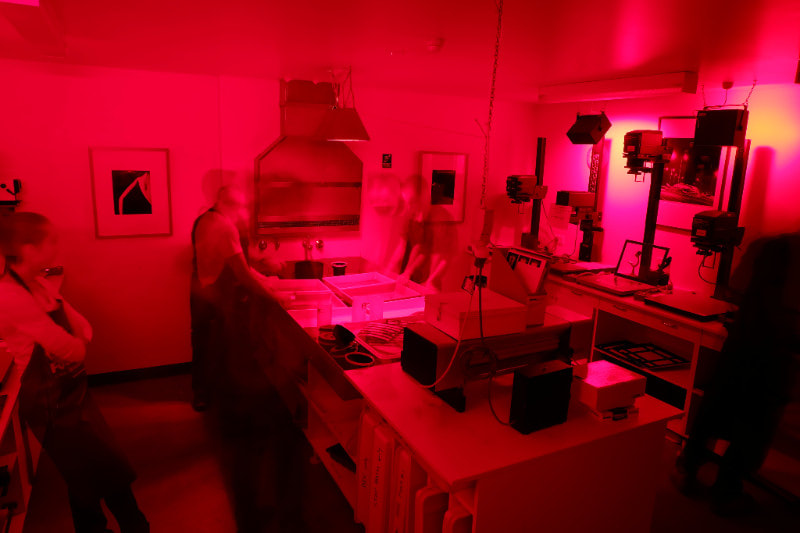
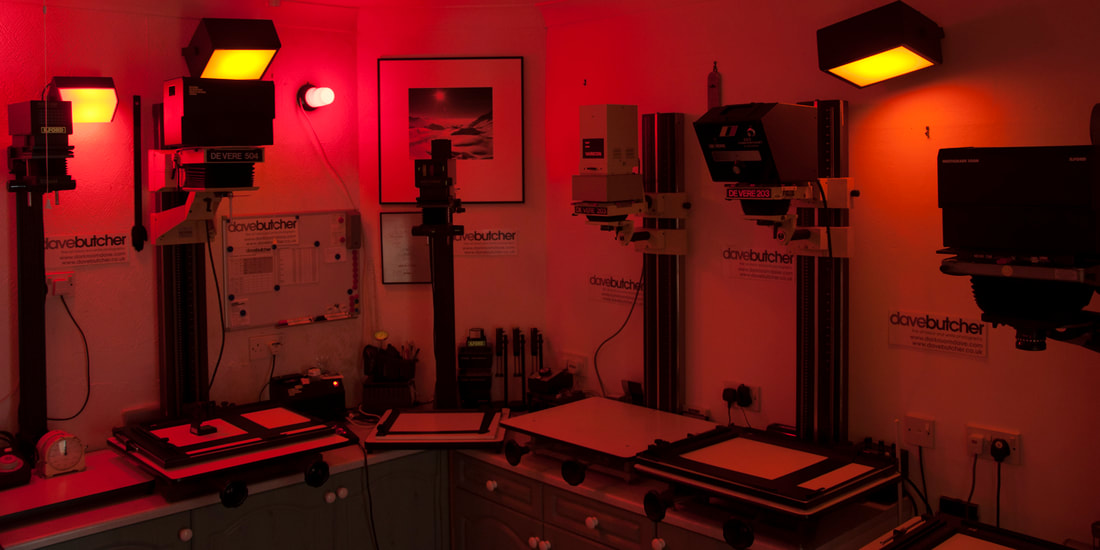
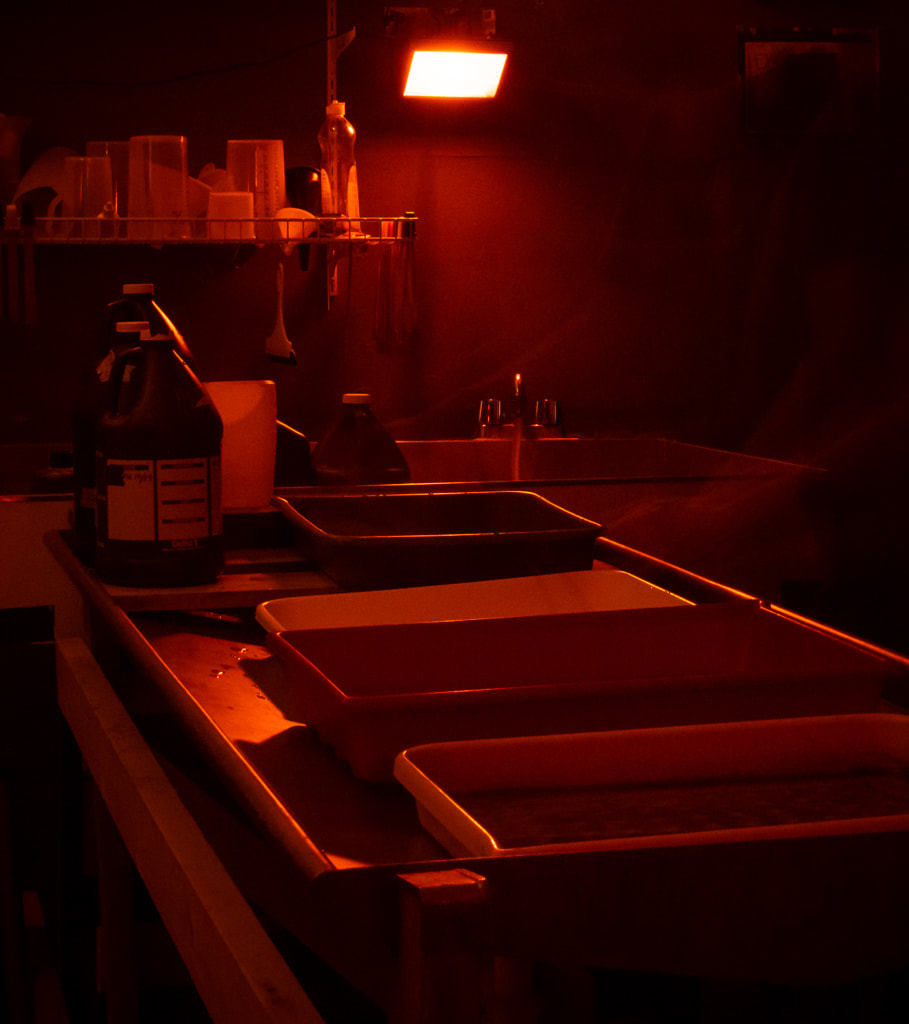
The Darkroom
|
The term “darkroom” was first used in the year1841, a time where many photographers did not have a dedicated dark room. The first need for a darkroom arose with the invention of the daguerreotype in 1839 be Louis-Jacques-Mandé Daguerre.
The darkroom is a blacked out room (no light must enter) often in a workshop or studio space. Photographers use this darkroom space to turn film roll into prints. It's worth noting, in the blacked-out room, there is a still a red light giving you the ability to see – but that doesn't affect the development process. A darkroom is used to process photographic film, make prints and carry out other associated tasks. It is a room that can be made completely dark to allow the processing of light-sensitive photographic materials, including film and photographic paper. The three basic chemicals are Developer, Stop Bath and Fixer. the Develepor is used to bring development to a quick and predictable end, and to prolong the life of the fixer. That is, the alkaline developer is followed by an acid fixer so development stops immediately which is then carried into the acid fixer which helps maintain the ph of the fixer. You leave your photographic piece of paper in the developer for one and 1/2 minutes, in the stop bath for at least 10 seconds and lastly you have to leave your photographic piece of paper in the fixe for 30 seconds- to a minute. To use the enlarger when trying to see the photo and place it right for when you expose it make sure the red lease is covering the light so the paper doesn't get exposed. if you're photogram comes out white it means its under exposed and you have to restart the process and keep it under the light for a bit longer, whereas if it comes out to dark or black you'll need to leave it under the white light for a shower period of time as it s over exposed. To test this before hand so you don't waste the photographic paper, you can do test strips. |
|
|
The pin hole camera
The pin hole camera is probably the simplest camera you can imagine and is based on the camera obscura which is a large room or container that has been blacken out except for a small hole of light.
Ben Nathan
|
|
|
Ben Nathan works across different media, from painting and photography to film and sculpture. His artistic practice reflects on the functionality of the city and its industry, documenting the evolution of urban change. Its scope draws attention to basic civil amenities, and the people who serve our society, in what could be considered as the ‘Real’ but ‘Invisible City’. His explorations into infrastructure act as a catalyst to question the changing nature of our cities environment and access to public or private space.
Process of making my pin hole camera...
|
A pin hole camera is a light-proof box with a tiny hole in the side. With no lens to speak of, the pinhole works as a tiny aperture through which an image is captured onto light-sensitive film or a camera sensor.
The image formed by a pinhole camera is real, inverted, and diminished. In the thirteenth century, the English monk and scientist Roger Bacon described the use of the pinhole camera to observe solar eclipses without damaging the eye
Measure out a piece of card and cut strips into the top. Also measure out a circle the size of the can lid. then cut lines into the paper where the pencil is drawn. Place this on the can gently and then fold in the strips so that it fits perfectly onto the can. Then get some strong tape and tape it around the can tightly so no light can pass through and there are no gaps. Then get a needle and poke a small hole through the can, finally get a strip of tape and place it over the hole so you know where to un peal when you are taki9ng you photo |


My prints

|
The top three photos are the original ones which came out inverted. The first one on the left is the side of a building, the middle one is a person shot, and lastly the one on the right is a below angle which looks up at the building and the sky. the bottom three photos are the sandwich prints for the above. To make a sandwich print what you have to do is, place a piece of photographic paper down onto you work surface in the dark room. then get you photogram you want to sandwich print and face it down onto the photographic paper facing towards each other. then use the bright light for a second or so and then process the paper at the bottom through the chemicals. For it to then be dried and completed. |
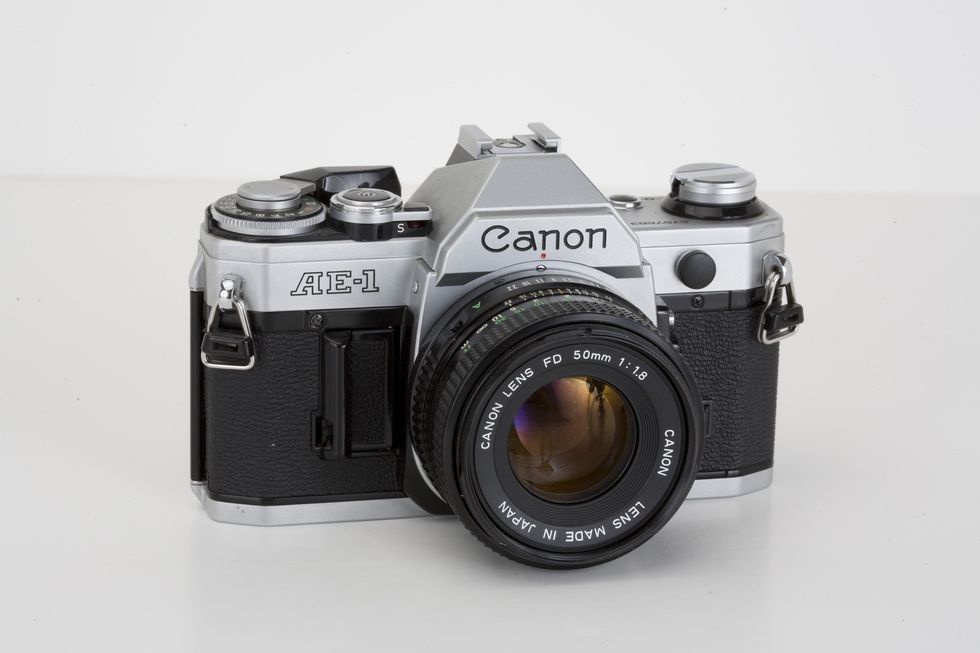
The film camera
|
The film camera was first invented in the 1980s by a man named Dickson who was born on 3 August 1860 in Britain who invented this amazing product under the employment of Thomas Edison. A movie camera is a type of photographic camera that rapidly takes a sequence of photographs, either onto film stock or an image sensor, in order to produce a moving image to display on a screen. |

|
|

|
Parts of a film camera
|
Lens- draws light into the camera and allows to focus on a subject or space Shutter- the length of time light is allowed into the camera and onto the film to expose Shutter Release- releases or 'trips' shutter mechanism Film Advance Lever-moves film from one frame to the next on a roll Aperture- how much light is allowed into/ on the film (f-stop). The larger the f-stop the smaller the hole and the less amount of light allowed in (inversely related) Viewfinder-window you look through to set up, focus and take picture Film Rewind Knob- rewinds film back into canister Camera Body- casing, holds in all camera parts Flash Shoe- where flash/ flashcube is mounted Self-timer- trips shutter after set time Shutter Speed Control- controls length of time shutter is open (fraction of seconds) Focusing Ring- turning the ring focuses the image. Some cameras focus automatically. Diaphragm- a circle of overlapping leaves inside the lens that controls the size of the f-stop, or lens opening. (amount of light) Aperture Ring- setting the ring determines the size of the diaphragm Mirror- during viewing, the mirror reflects light from the lens upward onto the viewing, the mirror reelects light from the lens upward onto the viewing screen. During exposure, the mirror swings out of the way so light can pass straight to the film. Pentaprism-5 sided optical device that reflects image from viewing screen into viewfinder. |
APERTURE- Aperture is a hole or opening through which light travels. however, more specifically, in photography terms aperture is the opening of a lens's diaphragm through which light passes. it is calibrated in f/stops and is generally written as number such as 1.4, 2, 2.8, 4, 5.6,8, 11 and 16. A higher aperture (e.g., f/16) means less light is entering the camera. This setting is better for when you want everything in your shot to be in focus — like when you're shooting a group shot or a landscape. A lower aperture means more light is entering the camera, which is better for low-light scenarios.
SHUTTER SPEED- In photography, shutter speed or exposure time is the length of time that the film or digital sensor inside the camera is exposed to light when taking a photograph. The amount of light that reaches the film or image sensor is proportional to the exposure time. 1⁄500 of a second will let half as much light in as 1⁄250. A fast shutter speed creates a shorter exposure — the amount of light the camera takes in — and a slow shutter speed gives the photographer a longer exposure.
SHUTTER SPEED- In photography, shutter speed or exposure time is the length of time that the film or digital sensor inside the camera is exposed to light when taking a photograph. The amount of light that reaches the film or image sensor is proportional to the exposure time. 1⁄500 of a second will let half as much light in as 1⁄250. A fast shutter speed creates a shorter exposure — the amount of light the camera takes in — and a slow shutter speed gives the photographer a longer exposure.
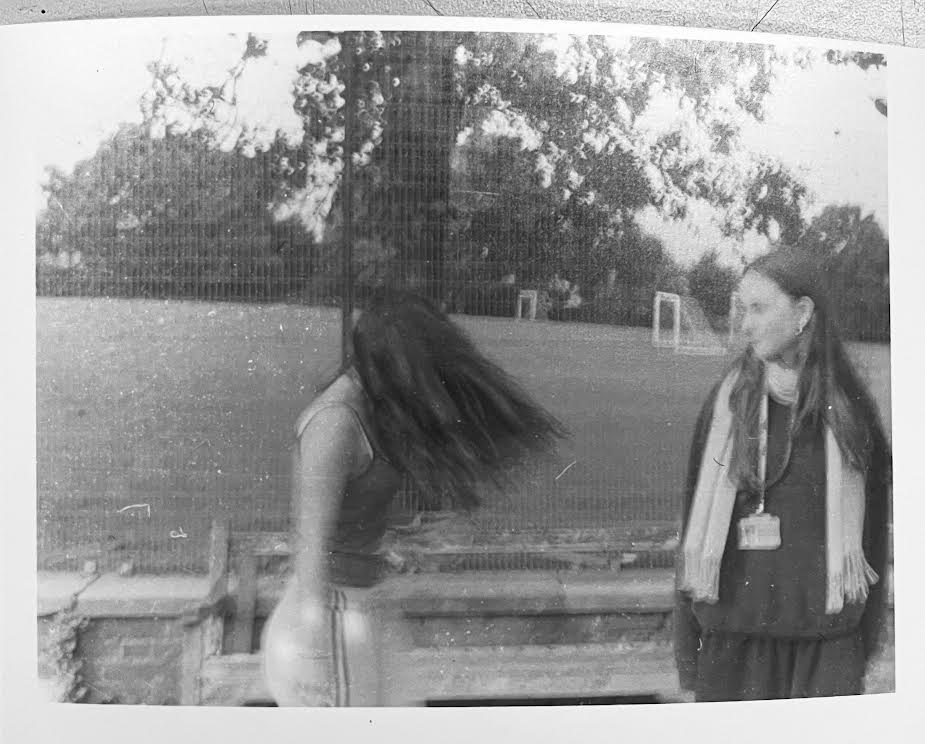
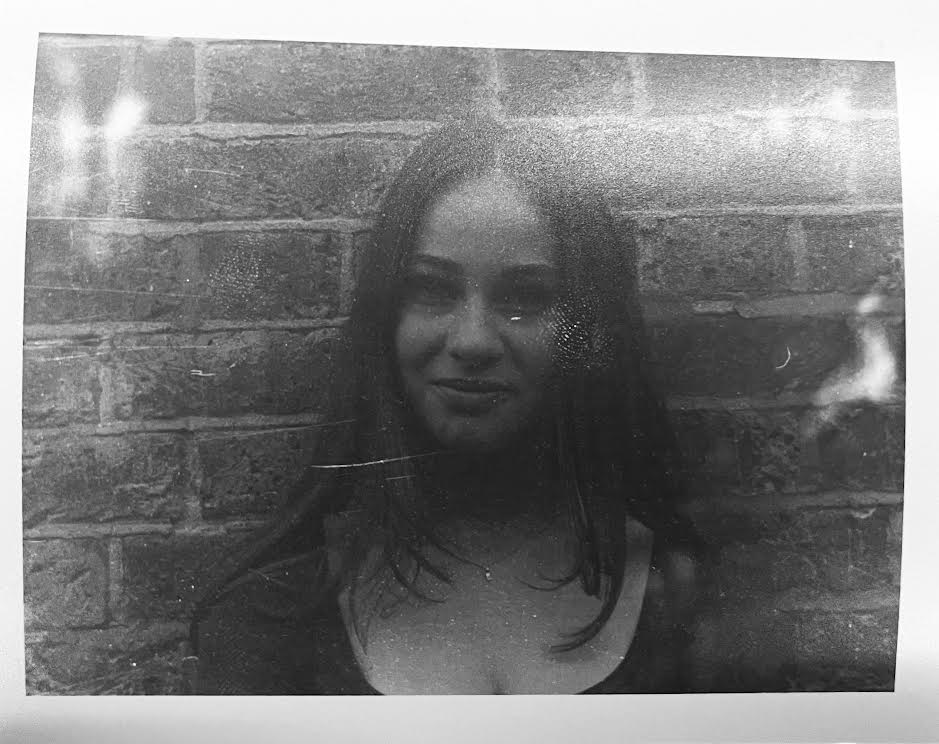
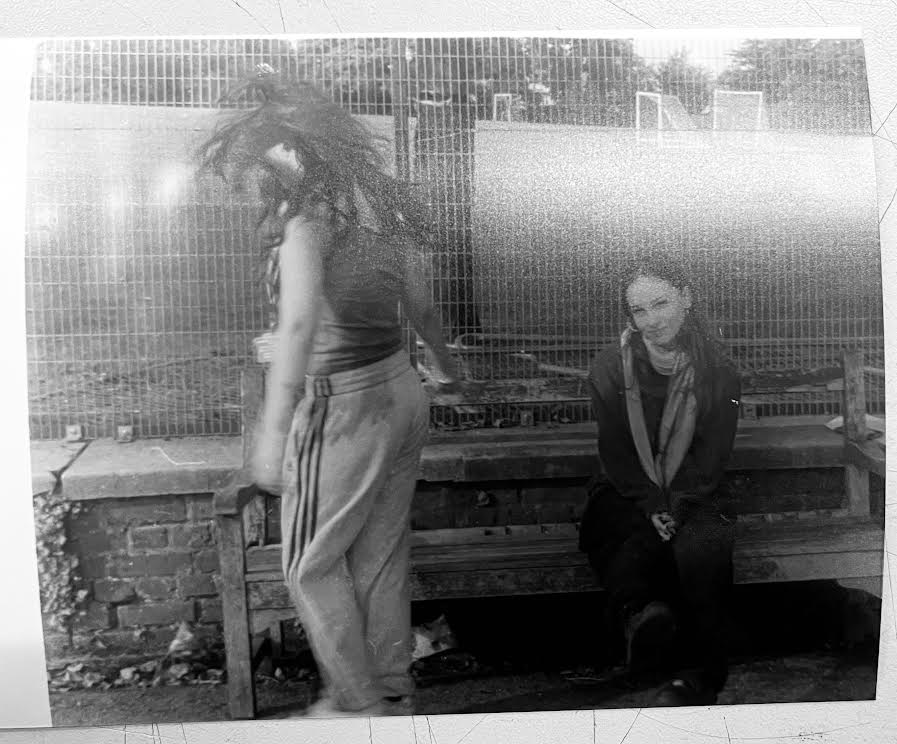
Contact sheet
For this task, we used a film camera to create our own contact sheet and experiment with the different apertures and shutter speeds on the camera trying to create different depths of field and different exposures.

|
A contact sheet, also known as a proof sheet, is a sequence of film negatives printed directly onto photographic paper.
Printing a contact sheet is very similar to a contact print. You simply place the strips of film emulsion side down on a piece of photographic paper, ensuring everything lays flat, and expose the paper. 35mm film should be cut into strips of 5 or 6 frames, and medium format film into strips of 3 or 4 frames. Contact sheets are traditionally used to proof an entire roll of film. They provide a quick reference of every frame laid out together so you can make quick selects. Exposure Reference. Contact sheets provide a better understanding of overexposure / underexposure versus seeing individual film scans. |
Process
I started of by trying a test strip on one of my photographic films by putting it through the enlarger and getting a piece of paper to expose it onto. then I got a black piece of cardboard and blocked everywhere but one part of my image and exposing it with the light for one second, then shuffling it down the paper (keeping the paper still) and doing another second til I got to the end. this enabled me to see the gradual change in darkness to lightness from the five to 1 seconds that the piece of paper was exposed to. from here I chose how long I wanted to expose that image for as I could see what the right contrast and exposure was just right.
I moved onto developing single shots from the film camera by displaying one photo with the enlarger onto the photographic film paper and then putting it throgh the development process and drying it.
when I was happy with some of these I started doing my contact sheet.
I first tried processing all of the photos with the same exposure, however some photos needed more then others.
so to fix this problem I used the black piece of cardboard to block certain photos out of the light that needed different times to others. therefore most of the images are well exposed.
Test Strips


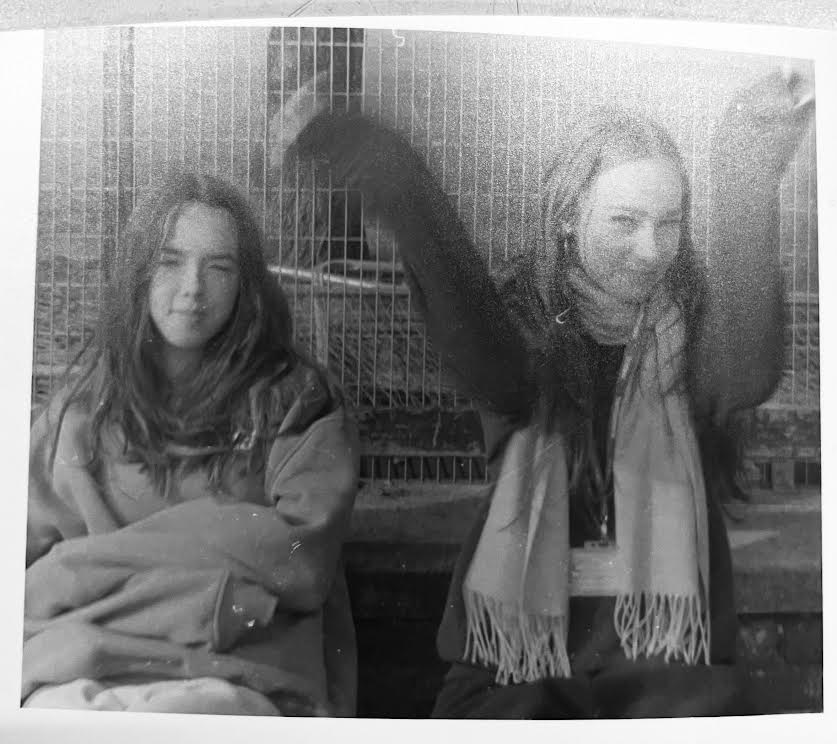
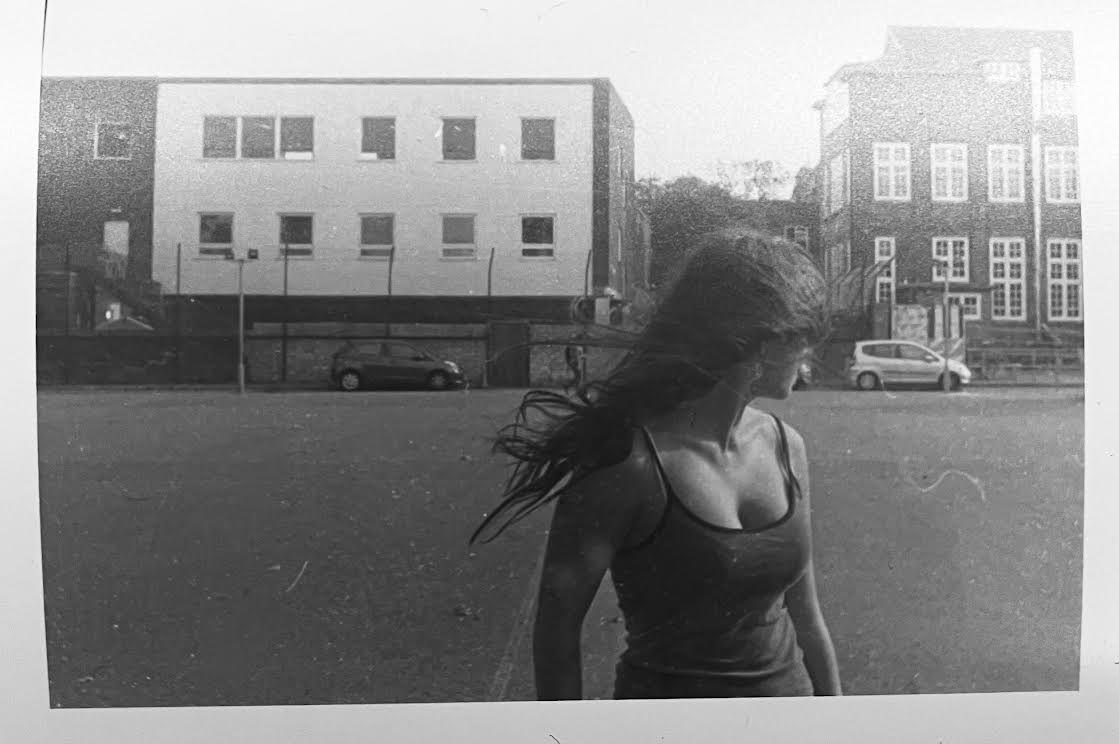
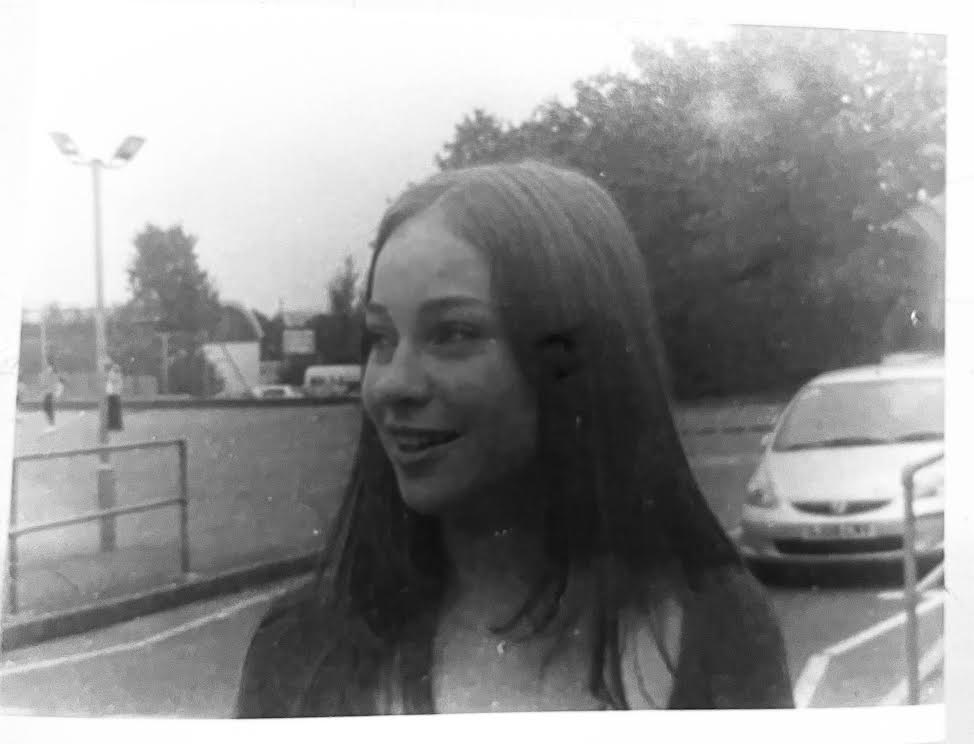
My photographs

|

|
|
|
|
