Selfie
The first selfie:
|
The first ever selfie taken was in the year was 1839, and it was late October or early November. It was taken by a man in his thirties named Cornelius, stood alone in the yard of his family's Philadelphia gas lighting business. 
|
What is defined As A Selfie? A selfie is a self-portrait photograph, usually taken with a digital camera or smartphone, which can be held in the hand or supported by a selfie stick. Selfies are often shared on social media, via social networking services like Instagram, Snapchat and Facebook. Also selfies are taken through the front camera which is normally inferior to the Rear Camera. The Selfie accounts for a large proportion of the digital photographs people make. According to a recent survey, 24 billion selfies were uploaded to the Internet last year (2016). |
My work
Photography selfie experiment 1: The reflected selfie
"Isle Bing, self-portrait in mirrors,1931"
|
Self-portrait in mirrors, 1931
|
Ilse Bing was a German avant-garde and commercial photographer who produced pioneering monochrome images during the inter-war era.
Many of Isle Bings photographs are set up multiple mirrors, reflecting different angles of her. For example, in her piece "Isle Bing, self-portrait in mirrors,1931", she creates the theme of duality in her image by using multiple mirrors to manipulate this idea. Additionally , in the photo, she deliberately blurs herself in the image, instead focusing on the other mirror behind her, providing an objective duplication of reality, as she provides multiple perspectives of herself, such as exposing her side profile, revealing the theme of appearance versus reality through a visual interpretation. Another reason why Bing uses a second mirror is that she intends to portray a fractured self. For example, in the image, she intentionally fragments herself by placing a second mirror at a different angle. This technique positions with the cubist movement.
Many of Isle Bings photographs are set up multiple mirrors, reflecting different angles of her. For example, in her piece "Isle Bing, self-portrait in mirrors,1931", she creates the theme of duality in her image by using multiple mirrors to manipulate this idea. Additionally , in the photo, she deliberately blurs herself in the image, instead focusing on the other mirror behind her, providing an objective duplication of reality, as she provides multiple perspectives of herself, such as exposing her side profile, revealing the theme of appearance versus reality through a visual interpretation. Another reason why Bing uses a second mirror is that she intends to portray a fractured self. For example, in the image, she intentionally fragments herself by placing a second mirror at a different angle. This technique positions with the cubist movement.
My response


Best edits

|

|
Photography selfie experiment 2: THE OBSCURED SELFIE
There are several examples of photographic Selfies in which the subject's face is obscured. This effect is a special feature of photography that doesn't feature so much in painting. The camera flattens three dimensional space so that something in the foreground can appear to be on the same level as something else in the background.
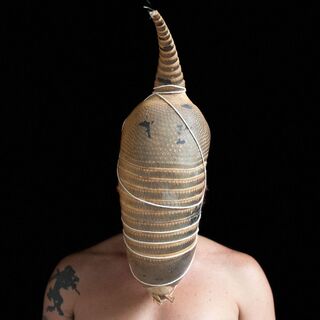
you can use all types of objects to take obscure selfies as its very abstract and you can create different types of feelings for the audience with where you place the object, the facial expressions of the person ect. for example string wrapped around someones face can crete4 an enclosed claustrophobic feeling from the photograph.
you can use all types of objects to take obscure selfies as its very abstract and you can create different types of feelings for the audience with where you place the object, the facial expressions of the person ect. for example string wrapped around someones face can crete4 an enclosed claustrophobic feeling from the photograph.
Edu Monteiro
Brazilian artist Edu Monteiro often puts himself into his own work, using his own body as part of the final work. In this series, he created masks that enveloped his entire head (often with organic materials, including animal body parts and tissues) to completely alter his personal sensorial experience of the world
Edu Monterio quotes "My sensorial self-portraits are personal fictions. The impulse emerged from a sensory mask made by a Brazilian plastic artist Lydia Clark With this impulse came the desire to try to manipulate and to wear an object that forced a change of sensations and self-analysis.
"So I started to create my own masks, not only inspired by the poetics used by Lygia, but also by different artists throughout the history of art who had marked my memory, such as Heliop Oticia . Carrying forward their ideas, I have created self-transformations, rather than creating artwork requiring the participation of others, as Clark and Oiticica did. I offer my own body and mind to similar experiences as the ones Lygia worked in the “file memory” of her patients: their fears and weaknesses, through the senses."

|
|
My photographs


Photography selfie experiment 2: The Shadow Selfie
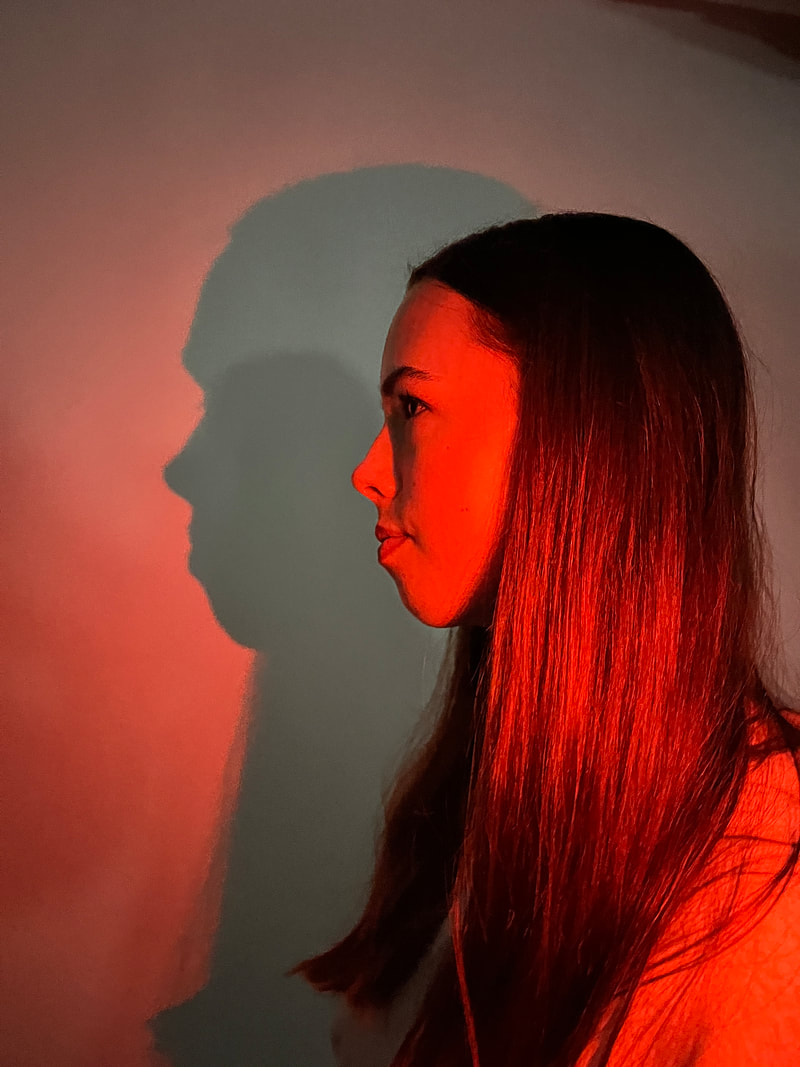
For my last selfie experiment i worked on shadows, where i experimented with the lighting inside and outside. Shadows are the dark areas where a light source is blocked by an object. Shadows change shape, intensity, and even color along with the angle, direction, and temperature of light.
Daido Moriyama
|
Daido Moriyama who is best known for his black-and-white street photography. Moriyama’s rough, unfettered photographic style makes use of sharply tilted angles, grainy textures, harsh contrasts, and blurred movements to capture the rawness of human experience as seen through the photographer’s wandering gaze.
|

|

|
My photographs
I wanted to photograph shadows out and in of the school, but when going around i couldn't find any as it was too bright outside and there wasn't the right lighting. so instead I went inside and used a flashlight inside to create shadows onto the wall using different angles and lighting. Shadows are formed by light, because if light shines onto an object, and the object blocks the light, the light will go sideways of the object, and therefore, a shadow is formed


Best Edits

|

|
WWW: a captured a distinct sharp outlined shadow, where you can clearly see the outline of the person. I like how the red light gives the photo a more unique look and contrasts very well with the black shadow as it emphasises the dark tone EBI: I could have tried to get my photos in better focus, since some of them look a bit blurry or grainy. I could have had a steadier hand and also adjusted my settings on my phone to get the photographs more focused. We had to use phones instead of cameras in this lesson, so I would've had better quality images if we were able to use a camera. |
Lighting
In this next task I was set to photograph my classmate in all different kinds of lightings. Such as variety of natural lighting, tungsten ligthing and studio set up lighting. I experimented with these types of lighting and evaluated, analysed and thought about the different ways in which lightings position and quality of light can affect any number of things in my final images, from clarity to tone to emotion and so much more.
Natural lighting
|
FACING AWAY FROM THE WINDOW
|
FACING THE WINDOW
|
|
This type of lighting, facing away from the window creates almost a silhouette. A silhouette is a solid, dark image of a subject against a brighter background. Silhouette pictures usually show the subject in profile.
FACING AWAY FROM SUN OUTSIDE
This type of lighting, facing the person in the photo away from the sun outside not only removes the bad shadows, it removes all of the defining shadows on her face. By turning the subject's back to the sun and exposing for her face, you get beautiful even lighting and a nice rim of light around her head.
|
This type of lighting, facing the window creates highlights on the face. In some of the photos the light shines on one side of the face, and the other half is hidden in the shadows. This type of natural lights brightens parts of the face giving it a natural glow.
FACING THE SUN OUTISDE
This type of lighting, where the person in the photo is facing the sun brightens up their face and makes them the main focus in the image. This lighting makes their eyes glow and light up and evens out their skin tone.
|
|
DARK ROOM: RED LIGHT
This type of lighting, red light photographs make the persons features stand put and become quite bold. The red light is so strong that the only colours that come up are red and black. Digital camera sensors are much more sensitive to red light than any other colour, making it very difficult to catch detail when your subject is lit in all red especially when they're moving around. Thats why when i was taking these photographs i had to use a tripod, put a 3 second timer so the camera didn't move an inch, and the person in the photo had to stand very still so that i could get them in focus.
|
BEST EDITS
WWW: i really like how most of my images came out because it reflected the big difference in the types of natural lighiting which we come across daily. i really like my best edits compared to the BEFORE photographs which are shown above in the slideshow because i adjusted the contrast in photoshop; contrast is a noticeable difference between elements with comparable features, like light and dark, thick and thin, pastel and neon, and so on.
|
By creating contrast, you can draw attention to certain areas and make your site more dynamic and visually appealing which is what i feel i achieved in the AFTER photographs. I also adjusted the exposure in photoshop, i did this to make my images neither overexposed nor underexposed.
EBI: Most of my images are well focused, however some of my red light photographs could have been focused a bit better, but i found these quite hard to take since the camera sensor was very sensitive to the red light which made it a bit tricky to photograph. The first photos i took in the darkroom were extremely unfocused so to improve this and make it better what i did, is i used a tripod and set a timer and told my model to stand very still so that there wasnt any movement which the camera would be sensitive to, and by adding these extra objects and doings in place i ended up with good foucsed images in the end.
EBI: Most of my images are well focused, however some of my red light photographs could have been focused a bit better, but i found these quite hard to take since the camera sensor was very sensitive to the red light which made it a bit tricky to photograph. The first photos i took in the darkroom were extremely unfocused so to improve this and make it better what i did, is i used a tripod and set a timer and told my model to stand very still so that there wasnt any movement which the camera would be sensitive to, and by adding these extra objects and doings in place i ended up with good foucsed images in the end.
Studio set up lighting
|
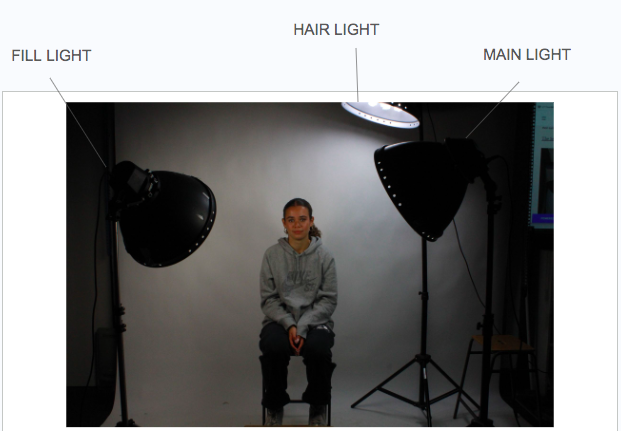
After taking the natural light photographs i then went into the studio and tested out the studio lights with a white backdrop. I experimented these new lights in the following set up(three differently placed lights). These are the basics of taking portraits with studio lights.
|
|
MAIN LIGHT
The main light is the primary light source for your portrait. It's most often placed right in front of your subject, at an angle, illuminating one section of them. I had to figure out where the shadows fell and i adjusted the position of the light until I liked what I saw. Half of my subjects face face is very much in the shadow. I found that lower, rather than higher light positions will create shorter shadows.

|
FiLL LIGHT
Fill light is the secondary light in the traditional 3 point lighting setup. The fill light is typically positioned opposite of the key light to literally fill in the shadows that the key light creates. This light has much less intense lighting than the main, but this is a good thing because the fill light should not match or overpower the main light. This light is only responsible for exposing the details of a subject that fall in the shadows of the key light.

|
HAIR LIGHT
The last light is The Hair Light which is positioned above my subject and pointed down to strike her hair. This light illuminates the hair.
You should make sure the hair light doesn't reach the subjects hair, the background, or the lens. It's a precise source of light with a single goal. 
|
Character recognition
Myra Greene


Myra Greene is an American artist who has worked on a number of projects, mostly photographic. In this series of photos she takes photographs f parts of peoples face, capturing all the texture and fine details of the human face. she puts the image and back and white so the certain parts of the face are more defined, and to make parts of the face stand out and catch the viewers attention. She edits the edges of the photograph with photoshop by making the outline look printed and to give it a rustic edgy look.

|

|

|

|

|

|

|

|

|
Best Edits

WWW: my photos are all very well focused as i used manual focus so i could adjust the depth of focus myself. Also i really like my best edits because the tones are quite cool toned and their not completely black and white as loads of grey ashy tones are presented through the best edits. their is still a very noticable contrast like in Myra Greenes photographs.
I really like how I edited my photos in photoshop to get a textured bleached look that Myra green achieves on the edges of her photographs. The edges of my photographs look quite different to hers but still give the same style but with a twist. To get this type of texture within my best edits, I got a picture from the internet of a wall with paint flaking off, as it gives a rustic look and makes the photo look more unique. |


|
EBI: i could have tried getting closer up to the person in the image as most of my photos are a bit far showing loads of features rather than just one, or one specific section. for example Myra green gets really close up which then results in capturing more texture on the skin.
Valerie Kabis
Valerie Kabis experiments with light, shadow and variations in focus, Kabis creates a series of dark and thought provoking images. She is Is interested in how shapes are created by limiting light. Her photographs use a slow shutter speed and high ISO to create blurry, quite high exposed photograph.
This creates a distortive and surreal look.
This creates a distortive and surreal look.


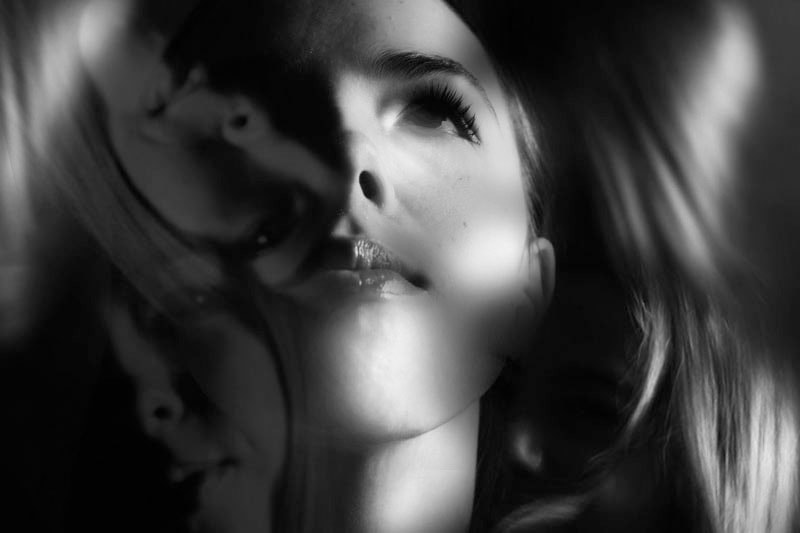
My Photographs
In my photographs my camera was set to manual mode with shutter speeds from between 1/15 and 1/60 sec, and a a high ISO to get a semi blurry, quite bright photograph. I shot from different angles, and made my subject in the photo move their face and hair so that i could get a blurry photo of them that looks quite deformed, contorted look.


|


|


|


|
Best Edits

|
WWW: I like how In photoshop I went to filter gallery and then added grains to the picture to give it the same type of texture that valerie Kabis' work has. I like the different contrast within the photograph of the different tones EBI: in valerie Kabis's images her subject in the photo is more cool toned. Her subject in the photo is lighter so it contrast more with the dark background, so in photoshop I could've realised this and made the subject less grey and more bright. |

|

|
George town
Documentary Portrait photography
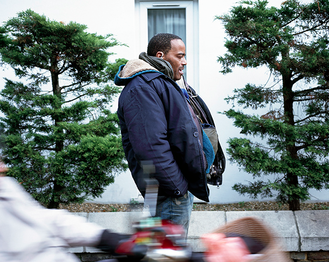
|
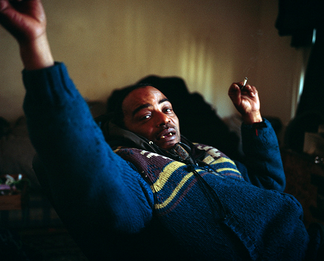
Lewis Khan is a photographic artist born and raised in London, working with stills and motion. His 'Georgetown' project is a series of images telling the story of south London resident George and his life. George being 'A friend, a neighbour, a familiar face in the street.' Lewis Khan says that 'Georgetown is a view into the life of south london resident, George. During a period of my adolescence that saw playing football in the street as a daily ritual, George and myself often shared the same space. Frequently we would meet with a simple nod, more frequently a hello, and on occasion George would join in for a kick about. Georgetown is informed by six years of these impromptu and informal meetings in the street, usually the same one'. |
|
|
|
Response 1
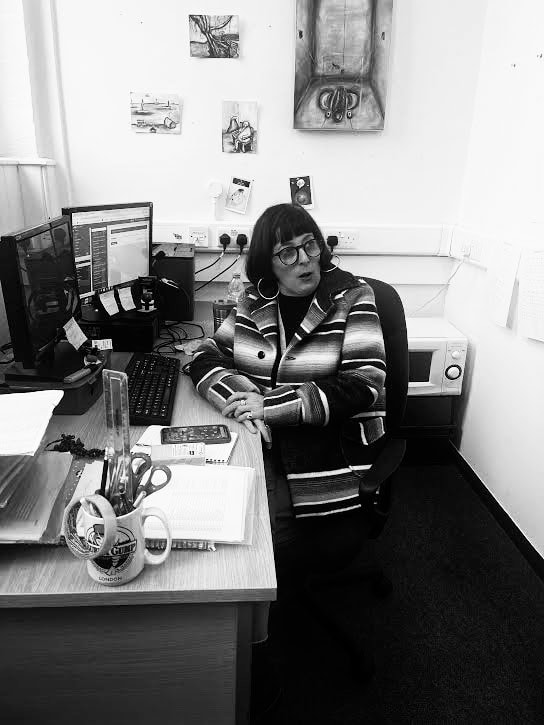
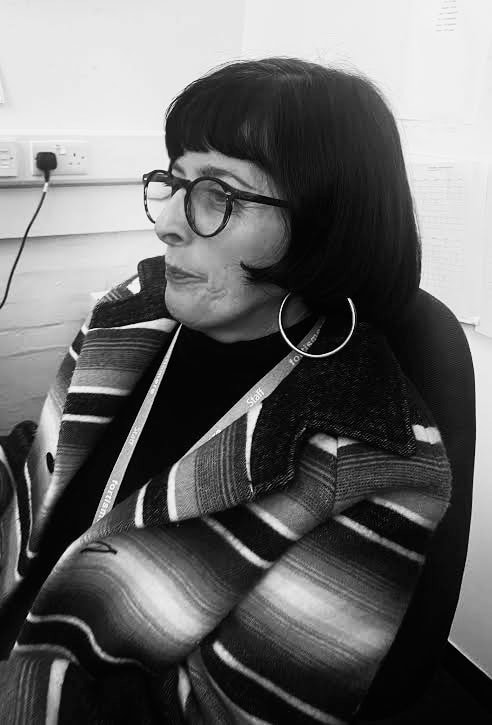
In this task, I was required to respond to the work of Lewis Khan, and take images of different teachers and subjects around the school. The goal was to capture the staff in the environment of their subject or area, for example the canteen staff in the canteen. For each teacher, i photographed their workspace, a couple photos of themselves and then additionally i took photographs of them in action doing their job.
Food tech teacher |
Security Guards |
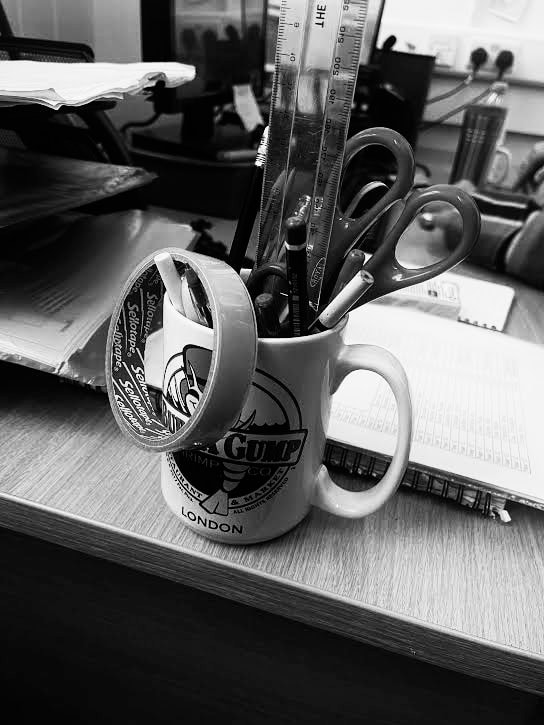
Office worker |
|
|
|
|
I then moved on and chose a few images out of all the ones i took and edited them. As you can see below i chose three from my images of the food tech teacher named Mr Ward , some of the food that the students are using to cook their meal look very colourful and fresh. I chose these three images as i think they give a good insight into him guiding his students as they cook and helping improve their meals and give advice , i chose the image of him teaching his students, the equipment in the classroom and ingredients, and then a picture of him looking directly in the camera. When editing i increased the saturation just a little bit to make the colours pop a little more.
I also chose to edit the images of the office lady, i decided to make these ones black and white because it gives the images a clean sleek sharp look and feel. I chose those three images with the same thought process for the food tech teacher, they incorporate everything.

|

|

|
|
|
|
WWW: I prefer my photos of the office worker as they capture all of the different aspects of her work a bit better. As well as this, the black and white give the photograph a more finished sleek look and makes a great sharp looking contrast the photographs.
EBI: I could've tried to position my photographs of the food tech teacher a bit better since in some of my images in this section I can see the light from the window or light from the ceiling clash with the lens and the subject making the photograph look a bit blurry as it isn't able to focus on one singular subject as there is too much light coming from different angles.
EBI: I could've tried to position my photographs of the food tech teacher a bit better since in some of my images in this section I can see the light from the window or light from the ceiling clash with the lens and the subject making the photograph look a bit blurry as it isn't able to focus on one singular subject as there is too much light coming from different angles.
At home response
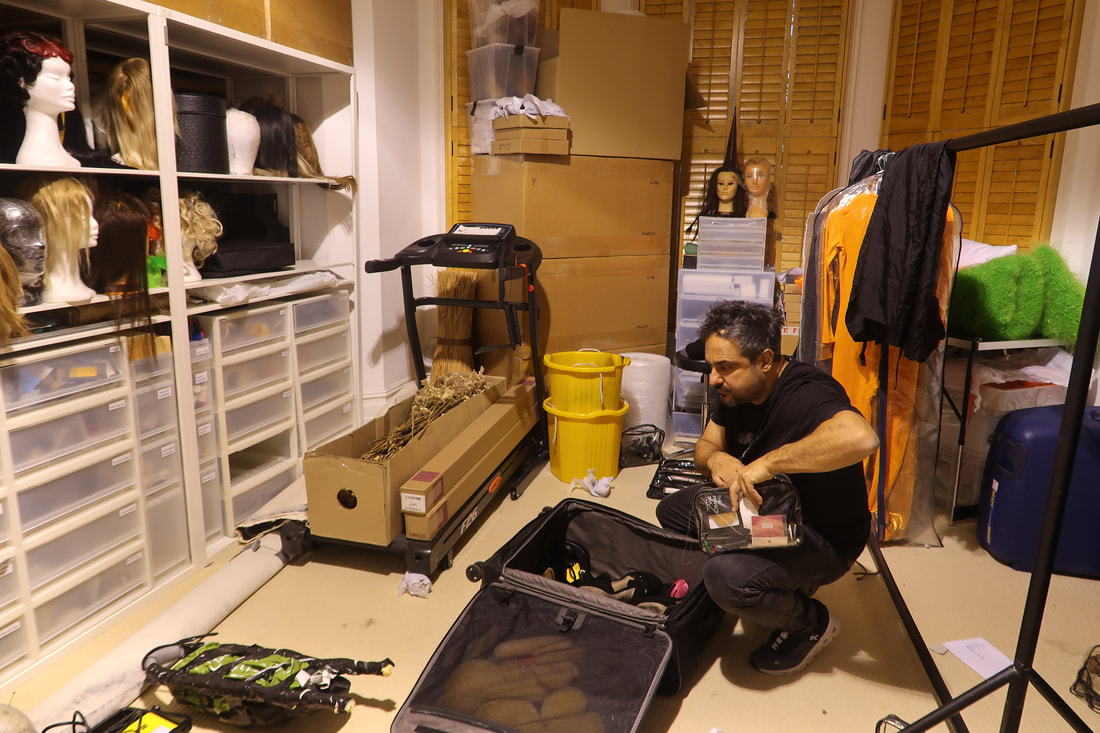
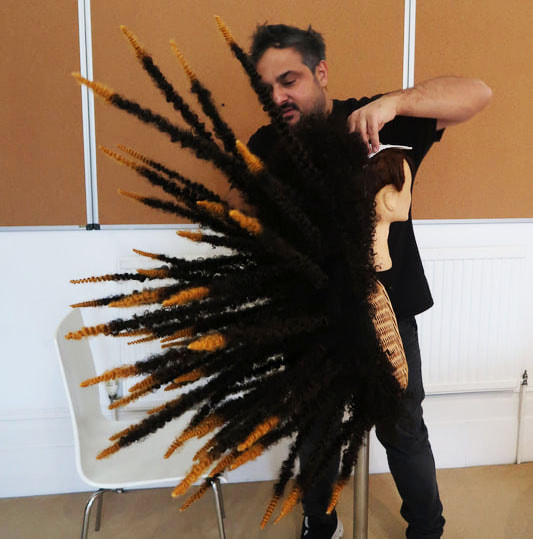
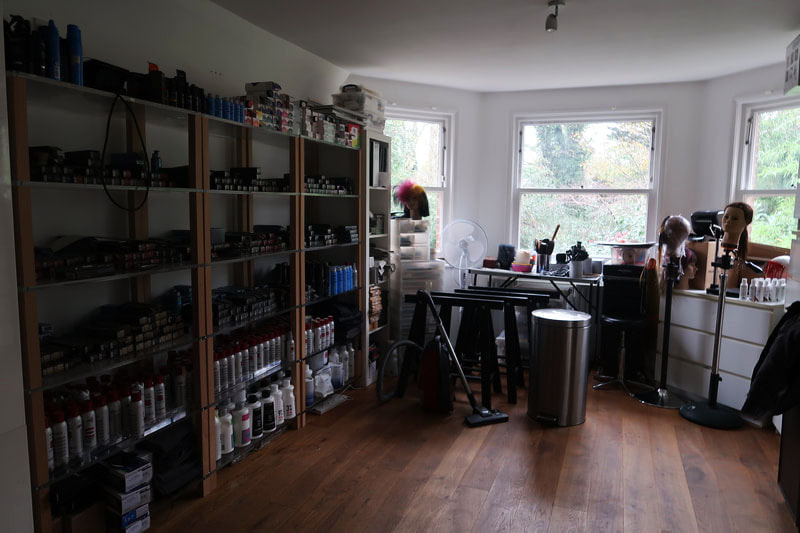
We were then asked to create a series of George town inspired images but at home. i took photographs of my dad named Angelo Seminara, who is a hairdresser; He creates over the top, creative and unique hairstyles from big crazy cuts to mesmerising colours and patterns. He practices on head mannequins but also has models come over to his workspace to see who fits the hairstyles best and performs the best for big, grand important shows that he participates in. He's Widely regarded as the most inspirational hairdresser of his generation, he has been crowned British Hairdresser of the Year four times and is also three-times winner of the Grand Trophy AIPP award, and Receiving the prestigious Fellowship Hairdresser of the Year award in 2008.
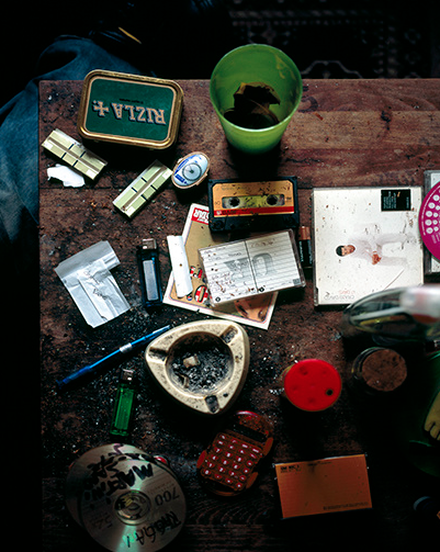
Most of his equipment is placed in our house, as we have three rooms dedicated to his work. There is the office where information is pinned on the wall and we have computers where his secretaries work, the studio room where he creates his big, amazing workpieces and the colour room where there is bleach, dyes ect. to produce cool patterns and hues.
i took some pictures of him doing his work around the house, different parts of his work and different parts of the rooms and lasty some of his pieces that he's working on at the moment


Best Edits
For my best edits i chose something my dad was working on (a project for an upcoming show), two of my dads workspaces out of the majority i showed in my photographs, some of his head mannequins which he uses to create new ideas for hair colours, patterns and shapes which he then builds on and uses the wigs made to put on models for shows and runways, and i also showed a load of his products which are stored in his workspace.
|

|

|
Ben Watts

|
Ben watts was born on the 19 January 1967, in London. He was a student at the Sydney College of Arts for 5 years, and in Australia he started his photography career. First he worked as a photographer's assistant and then started taking on commissions of his own, shooting for big companies such as Australian Elle, Vogue and many more. He came to New York in 1990, interested by american hip hop culture, and began documenting urban youth, going out on the streets and clubs of New York in strive to capture his subjects on film. Then, in 1995, he moved to New York and has since shot advertising campaigns for Jockey, Nike, Polo Ralph Lauren, Kodak, Miller Lite, The Gap, Quicksilver, Capitol/EMI, Sony music, Loud records and many more. He's a regular contributor to several magazines, involving New york times magazine, Esquire, GQ ect. The feeling of joy is of greatly significant within Watts' works which he self-titles 'The Happy Picture,' a term he created to describe the feel-good atmosphere of his work George Frederic Watts said 'I paint ideas, not things'. This enormous painting is an allegory (symbolic subject) in which the figures all represent ideas. The picture's main message is that all humans – from rich to poor – are revealed to be truly equal at the moment of their death." |
Best Edit
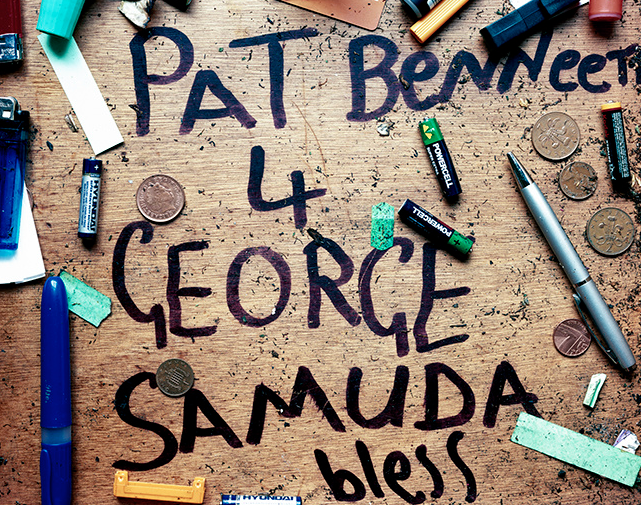
For this best edit, i made a collage of Cassius, i used multiple resources that were printed out. such as quotes said by cassius, information about him, pictures of him boxing and fighting, coloured pieces of paper cut up, and different pens to add more colour, design, and texture. I got a big sheet of paper and stuck pieces on one by one to create a interesting creative collage

|
WWW: i like how i placed the different photos, i like how the main focus or the most eye catching thing in the photo is Cassius throwing his hands towards the camera because it portrays his power, confidence, strength and his eye gaze is looking directly at the camera which seems like he is trying to challenge us viewers. its a very powerful image and shows his force and capability. i like how i cut out words "boom" creates a powerful sound which links to all the photos in the collage as he is a winner defeating all his competitors. EBI: i could have scattered the photographs a bit more in come places, as they are mostly around the edges. some of my cutting out could have been neater. Lastly i should have done it landscape because other collages that i had seen which were landscape looked a bit fuller, me doing it portrait made it a bit harder to look complete and packed. |
Independent Development
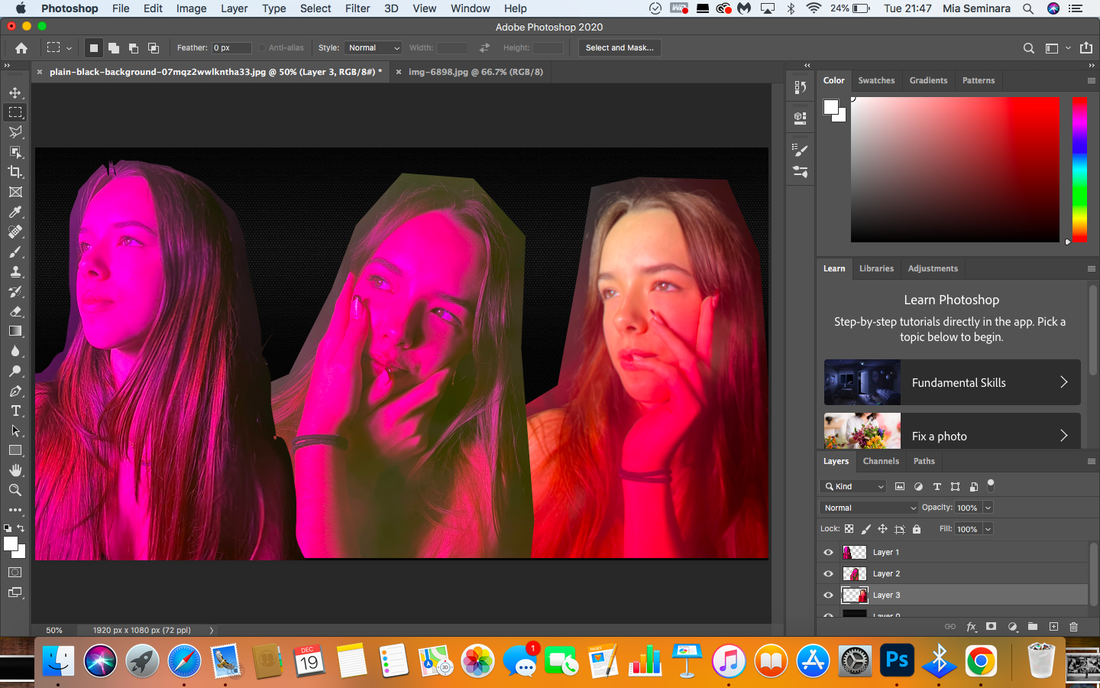
|
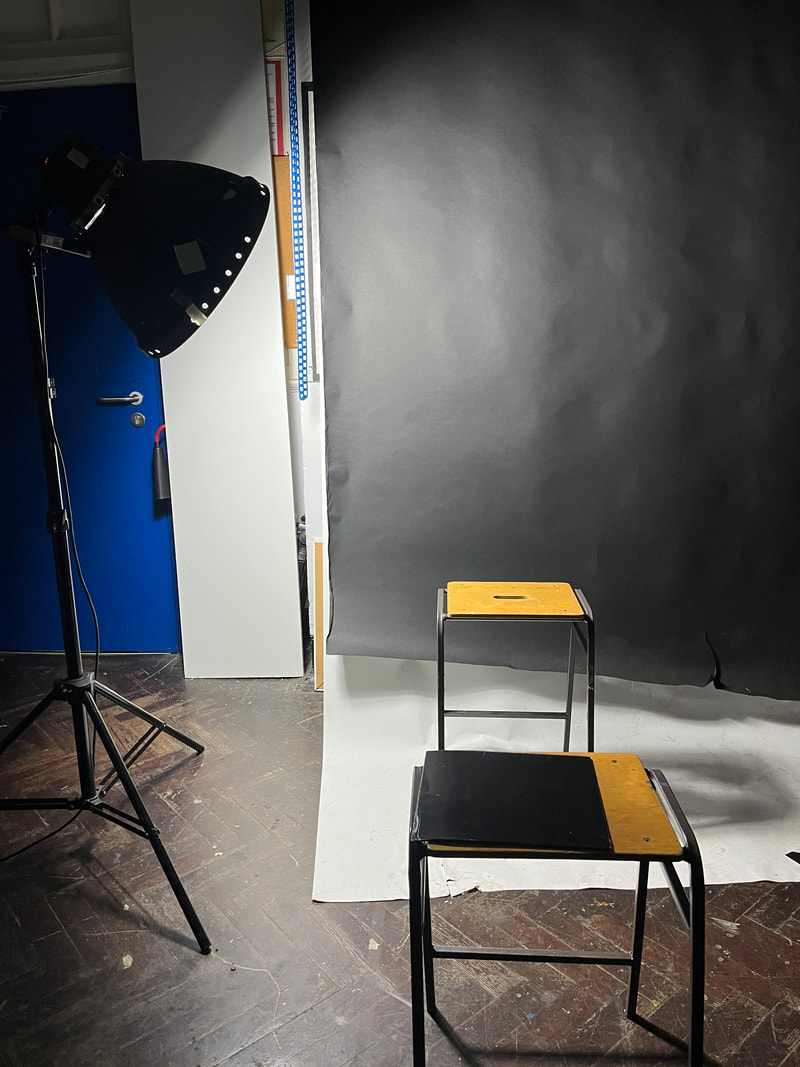
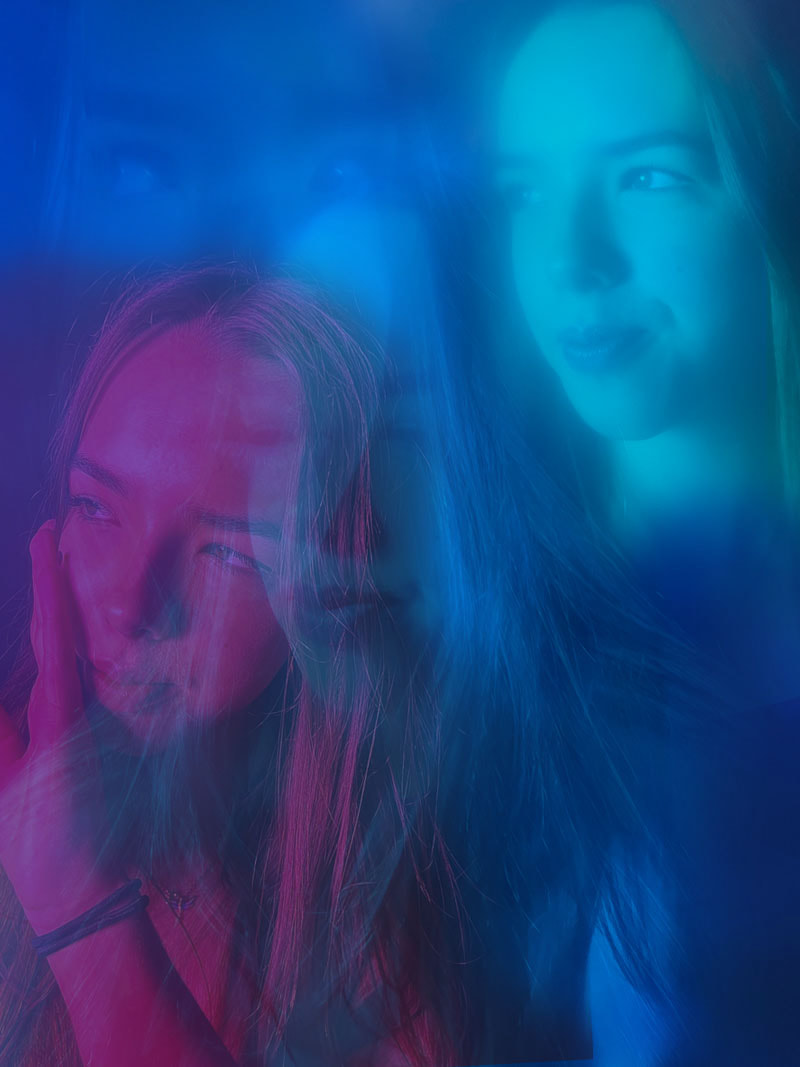
To further develop my last development i wanted to use different props when taking my photographs to create different colours and gradients within the image. I used pieces of coloured glass and put it in front of the camera lens to get vibrant, radiant colours, i also experimented with using different coloured glass pieces next to each other in front of the lens to create an ombre effect. For the setup when taking my photographs i used The main light, which is the primary light source for your portrait. It's most often placed right in front of your subject, at an angle, illuminating one section of them. I had to figure out where the shadows fell and i adjusted the position of the light until I liked what I saw. Half of my subjects face face is very much in the shadow. I found that higher light positions created longer shadows. |
Set up and props
|

My photographs


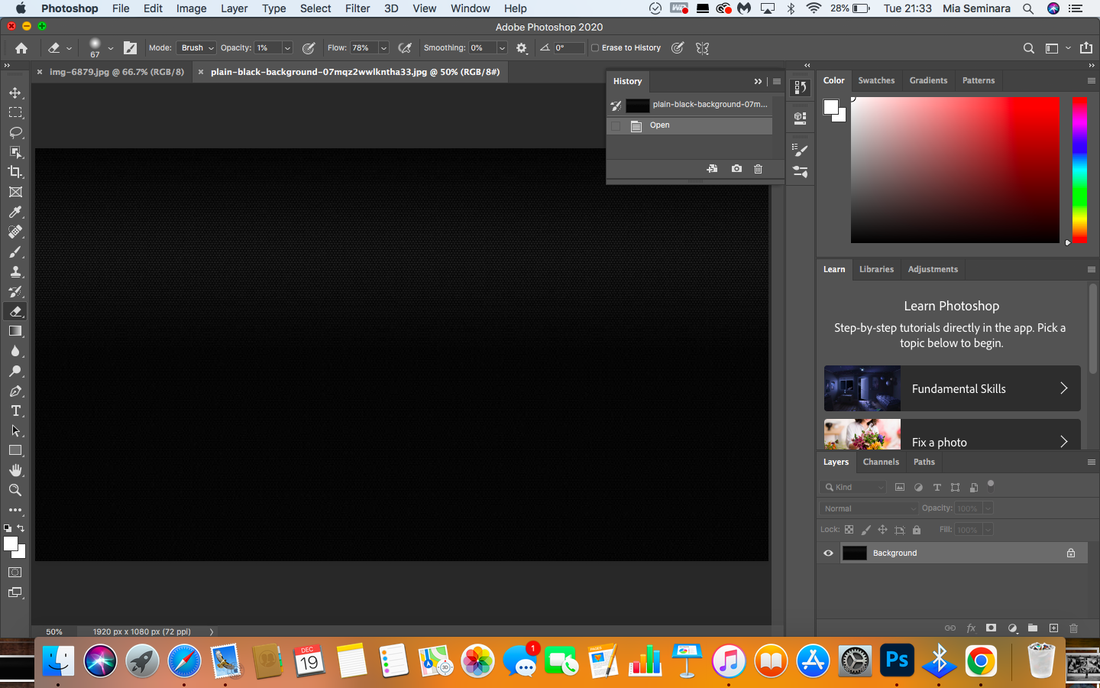
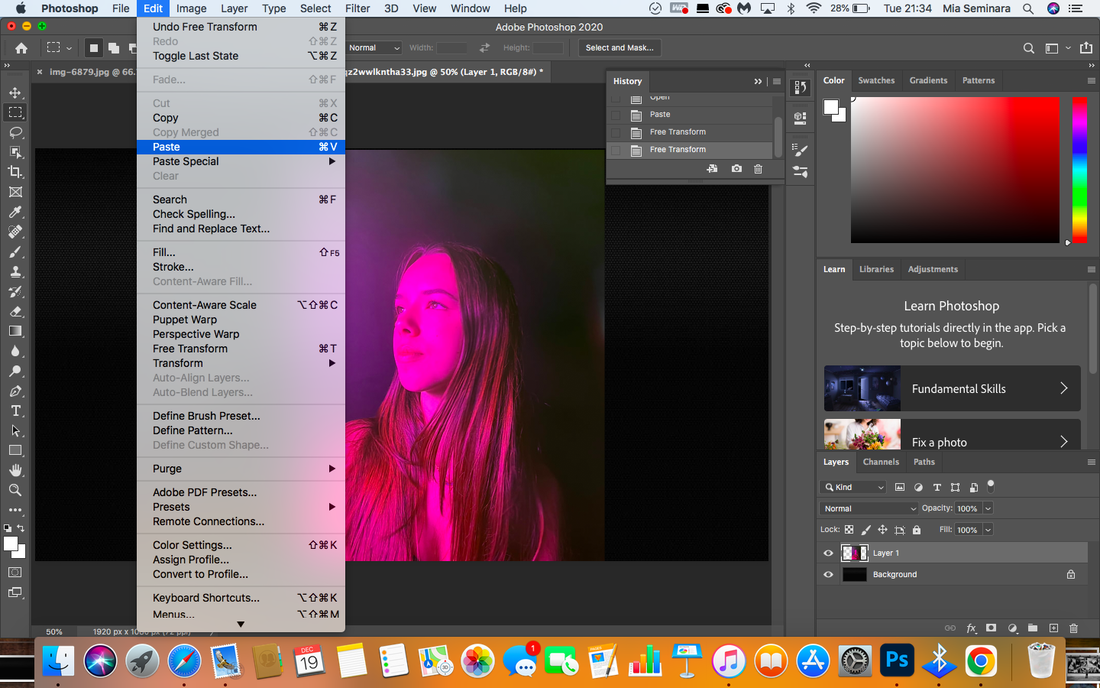
Screen grab
|
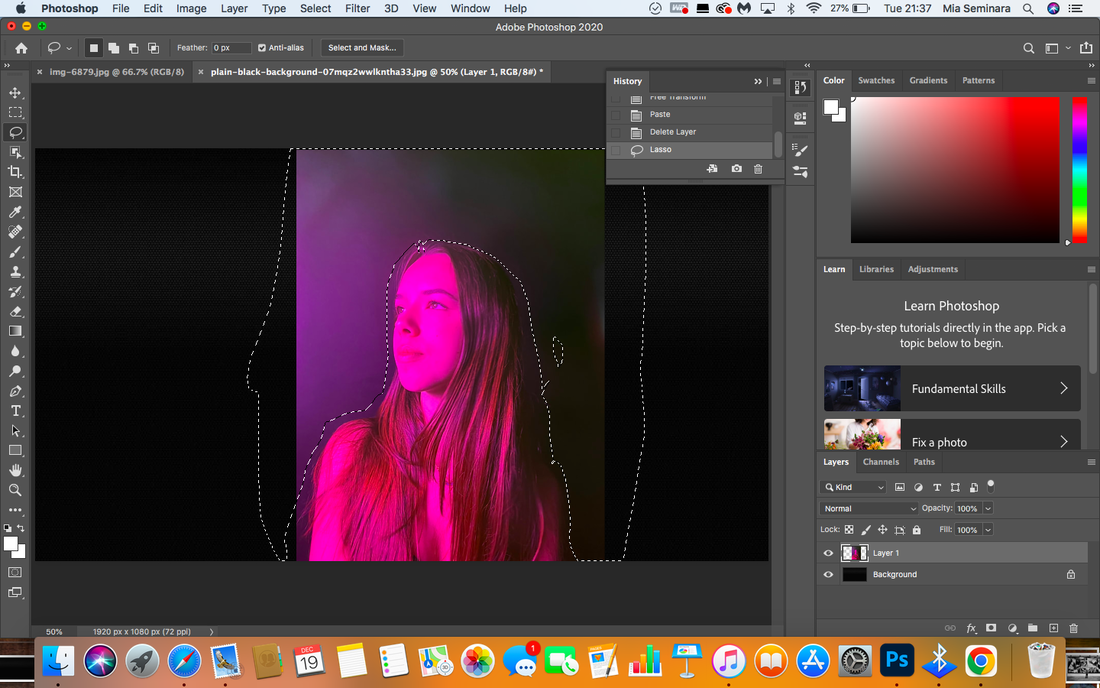
Next, i pressed onto the lasso tool on the left hand side where you can find the tool bar. I traced around the parts of the image which i didn't need and then pressed delete on my keyboard.

Finally, after using some different editing tools and adjusting some filters, this is my final image.
|
Best Edits 1

WWW: i like how all the different colours are very vibrant and eye catching. The black background makes the colour pop and stand out even more. furthermore, i like how i blended the photos together with the rubber tool to create an luminous and smooth look. The colours look like an aura, they radiate and fade out throughout the picture, the photographs give off good energy as the colours i used are extremely lively and most of them are usually associated with being happy.
EBI: After editing these photos i wanted to see if the edits would look better without the black background, because even though it gives more contrast and makes the colours look more radiant sometimes i felt like the colours crashed. |

|
Best Edits 2
In the second best edits, i wanted to see if the photos would look better without the black background, because even though it gives more contrast and makes the colours look more radiant sometimes i felt like the colours crashed. i do prefer it as the photographs blend together better and the photos look more appealing.

|
|

|
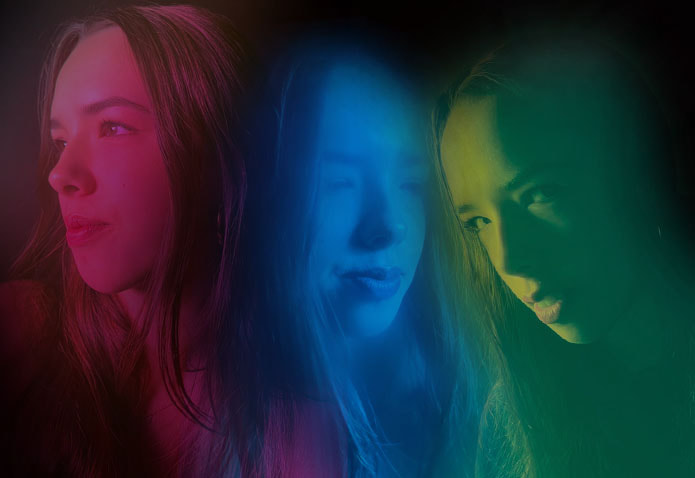
Final Independent development
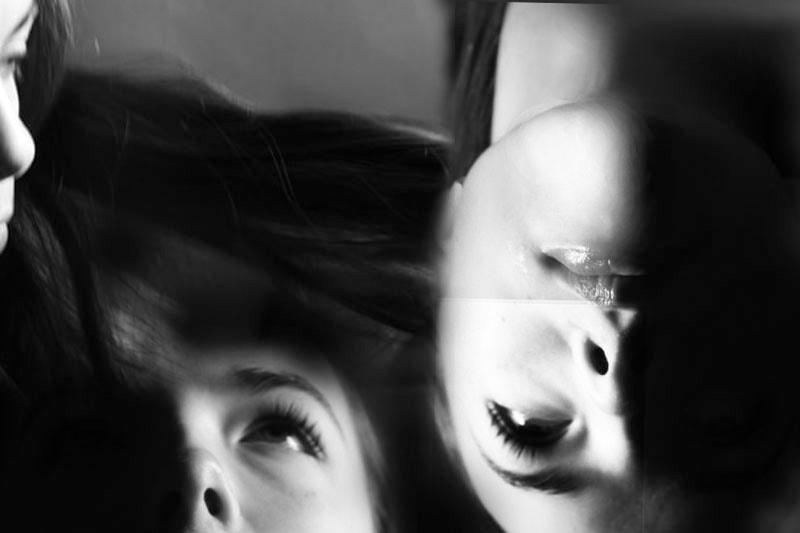
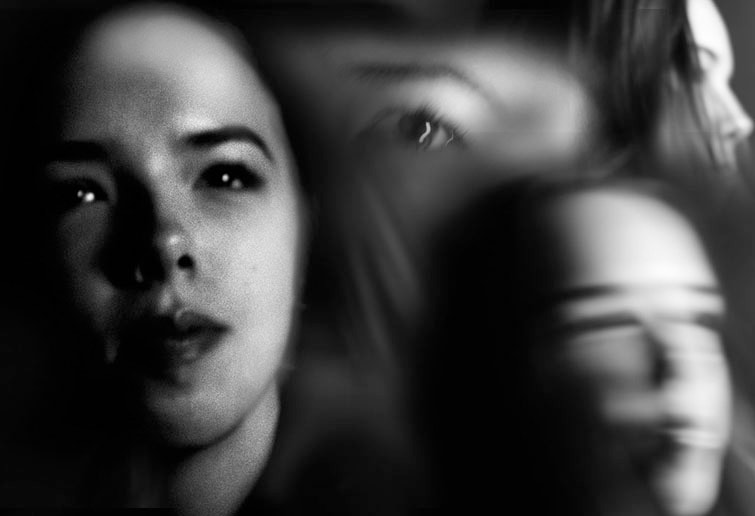
For my final development i wanted to not include the black background and just overlap the photos ontop of each other. i turned them into black and white which i prefer because it looks more professional and creates more dimension within the photo. it also gives the photographs a more surreal look overall.

|
|


Best Edits
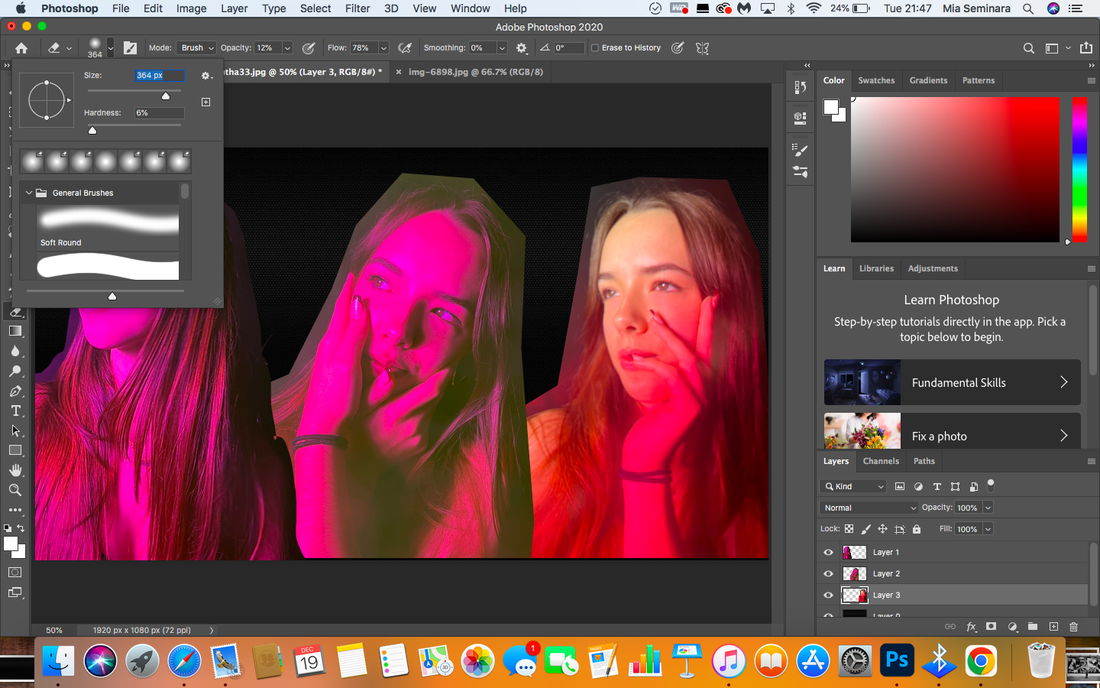
To edit these photos:
Firstly, i opened the photograph (which i wanted to be centre) in photoshop.
Next, i copy and pasted the other images which i wanted to include in the final edit
Then, i used the rubber tool and blended them together, making it look like one image (making it look seamless)
Additionally, i pressed layer and then flatten image so all of the different layers merged into one.
Furthermore, i pressed image>mode>grayscale, which turned my whole image black and white
Finally, the final touch i proceeded to edit my photos was adjusted the Brightness , contrast, and levels in the left top hand corner- i brought the exposure and contrast a bit higher, and adjusted the levels to get the right exposure and tones.
|
|
WWW: I like how these best edits look quite surreal and nightmare like. I like how i put them in black and white because the contrast of black and white within the photos really makes every detail stand out and gives the photograph more depth. Furthermore, I also like how some of the images are blurred and a bit out of focus as it gives it a unearthly, strange feeling in comparison to the photos which are very focused. I made some photos blurry and some sharp and focused so that within the edits there was a variety of shutter speeds and techniques. it also produces a range of textures to the photo.
